Monday Back to Basics & Pharmacology Treatment of dyspepsia in the ED… all the things [not to] do. October 28, 2024October 25, 2024 Ali JaworskiLeave a comment Ali Jaworski, MD
Monday Back to Basics & Pharmacology Evolution of STEMI Criteria and How it is Changing, by Dr. Pallavi Patil October 21, 2024October 21, 2024 Ali JaworskiLeave a comment
Monday Back to Basics & Pharmacology Myasthenia Gravis vs Lambert Eaton Syndrome September 30, 2024September 24, 2024 Ali JaworskiLeave a comment Renee Spencer, MS-4
Monday Back to Basics & Pharmacology Hyperglycemic Hyperosmolar Syndrome September 23, 2024September 23, 2024 Ali JaworskiLeave a comment
Monday Back to Basics & Pharmacology Basics of Mechanical Ventilation *Part 2* September 9, 2024September 1, 2024 Ali JaworskiLeave a comment Alyssa Exarchakis, MS4
Monday Back to Basics & Pharmacology Basics of Mechanical Ventilation *Part 1* September 2, 2024September 1, 2024 Ali JaworskiLeave a comment Alyssa Exarchakis, MS4
Monday Back to Basics & Pharmacology Regional Anesthesia Basics August 12, 2024August 12, 2024 Ali JaworskiLeave a comment
Monday Back to Basics & Pharmacology Bell Palsy May 6, 2024April 24, 2024 Ali JaworskiLeave a comment
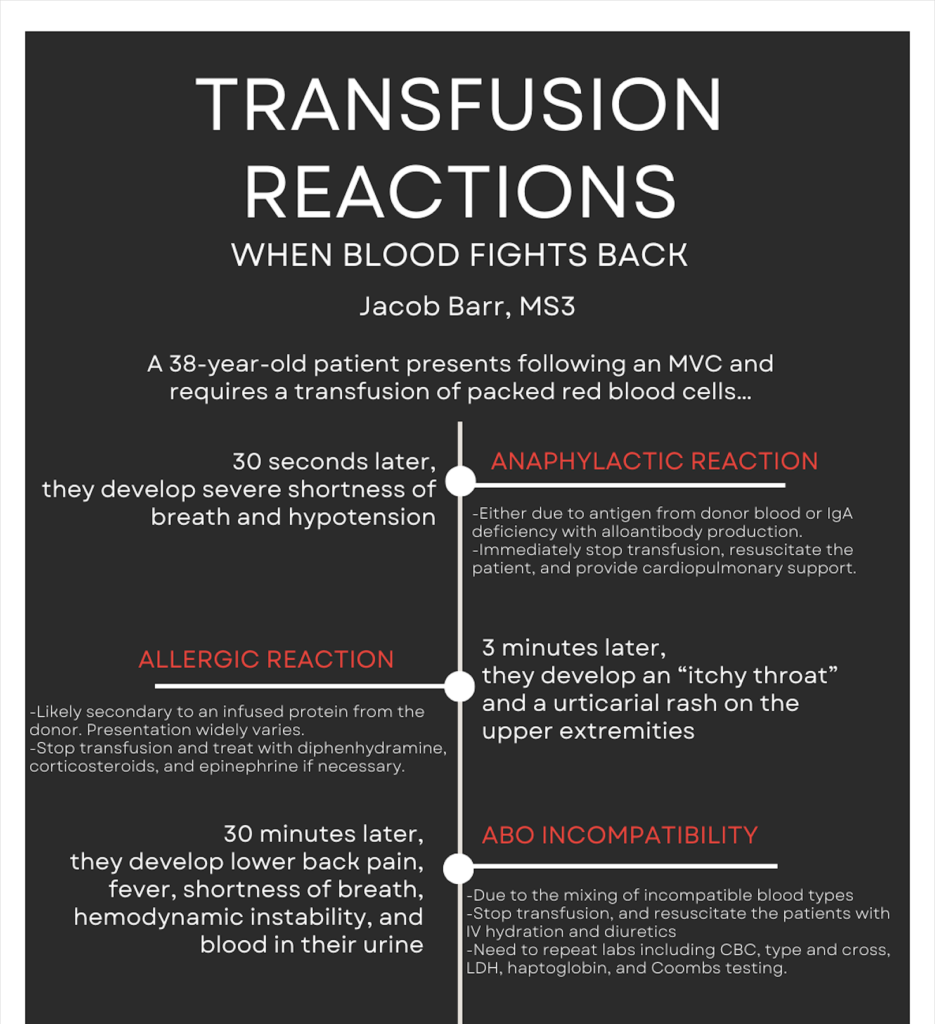
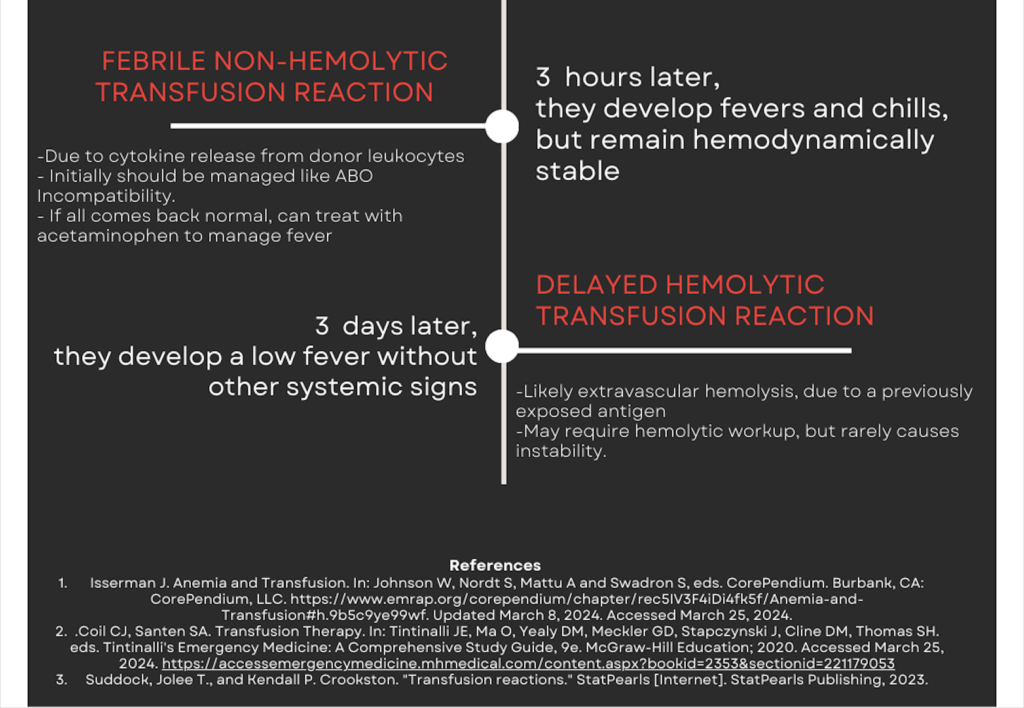
Monday Back to Basics & Pharmacology Transfusion Reactions April 22, 2024April 10, 2024 Ali JaworskiLeave a comment
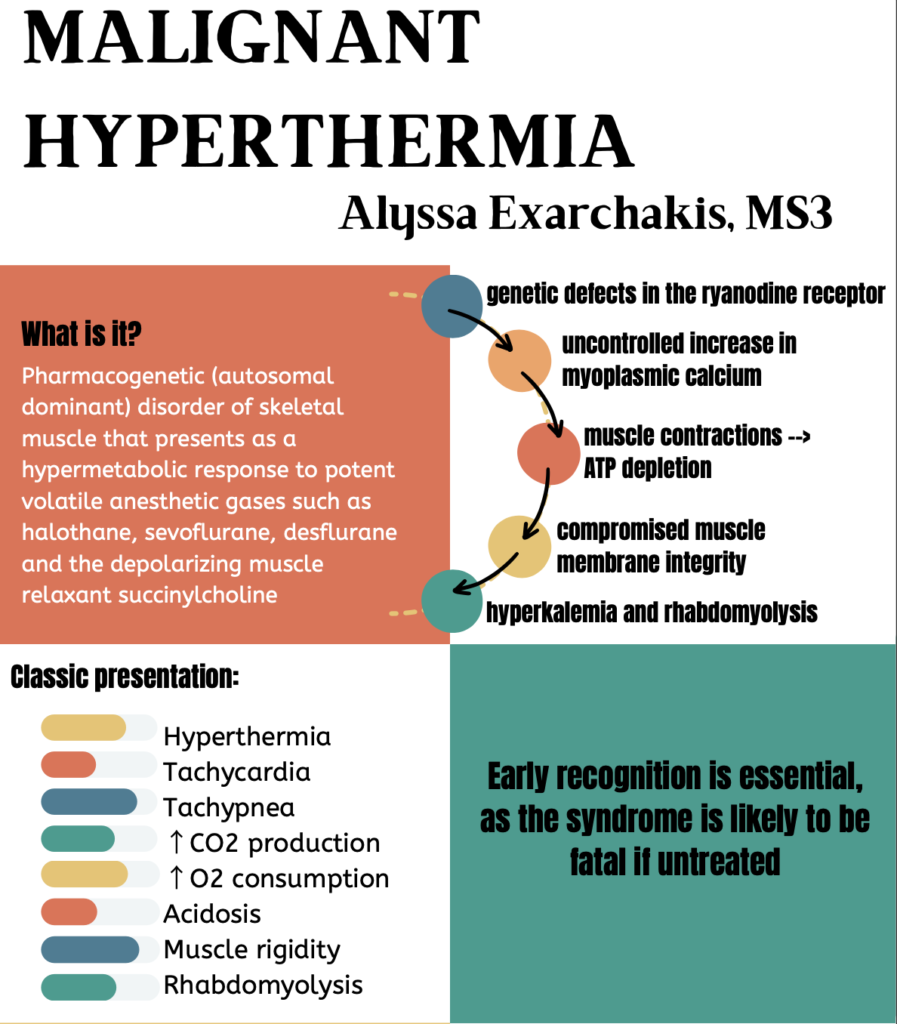
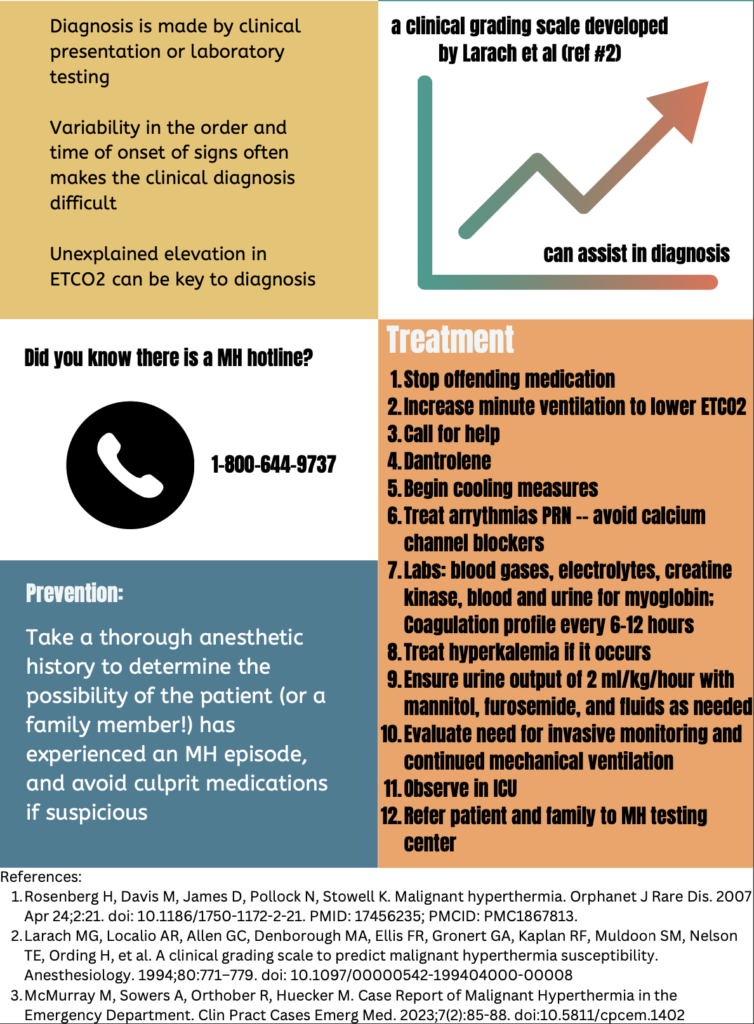
Monday Back to Basics & Pharmacology Malignant Hyperthermia April 15, 2024April 10, 2024 Ali JaworskiLeave a comment